맛있는 감자 튀김 아이콘 만드는 방법 - 포토샵 자습서
Hongkiat Baking & Culinary Arts Class에 오신 것을 환영합니다! 오늘 우리는 포토샵을 사용하여 시각적으로 맛있는 감자 튀김 아이콘을 손으로 만드는 법을 가르칩니다.!
그래, 당신은 주로 모양의 창조물과 레이어 스타일링이 포함 된 맛있는 감자 튀김 아이콘을 만드는 법을 배우게 될 것입니다. 초보자도 환영합니다! 이 튜토리얼은 확실히 당신을 가득 채울 것입니다..
시작하기
이 자습서를 수행하려면 다음과 같은 자원이 필요합니다.
- 미키 로시의 글꼴 야구장 와이너
- Bartek Nowak의 글꼴 재활용 - It
프렌치 프라이 아이콘
1 단계 : 감자 뽑기
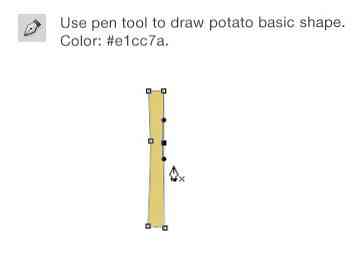
펜 도구를 활성화하십시오. 감자의 기본 모양을 그리고 # e1cc7a로 색을 설정하십시오. 우리는 직사각형 툴을 사용하지 않고 펜 툴을 사용하여 자연스러운 모습을 얻습니다..
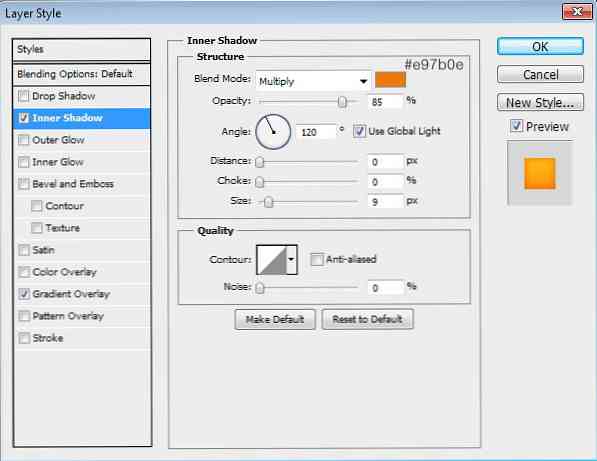
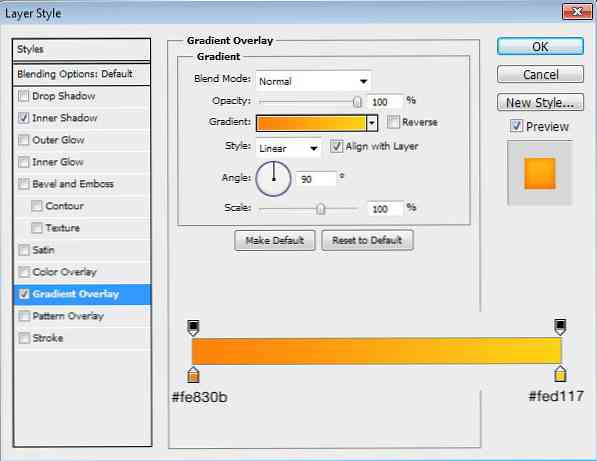
레이어 패널에서 레이어를 두 번 클릭하여 레이어 스타일 대화 상자를 엽니 다. 다음 내부 그림자 및 그래디언트 오버레이 추가.
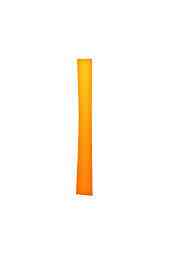
결과는 다음과 같습니다..
2 단계
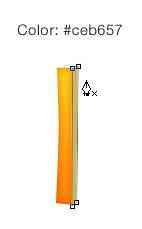
감자 쪽을 그려라..
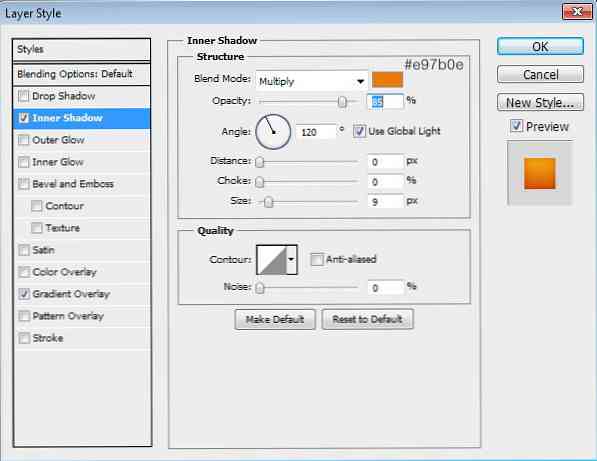
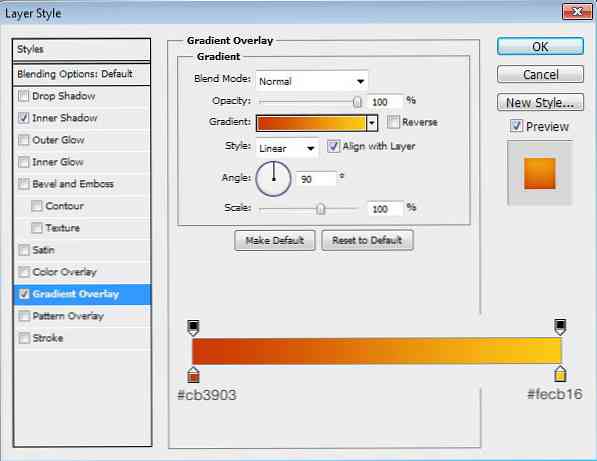
다음 레이어 스타일 추가.
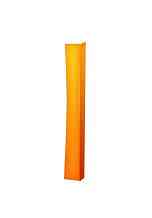
이것이 결과이다..
3 단계
마지막으로 상단 부분을 그립니다..
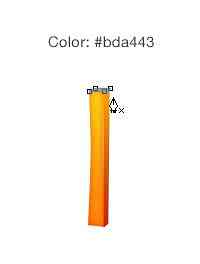
다음 레이어 스타일 추가.
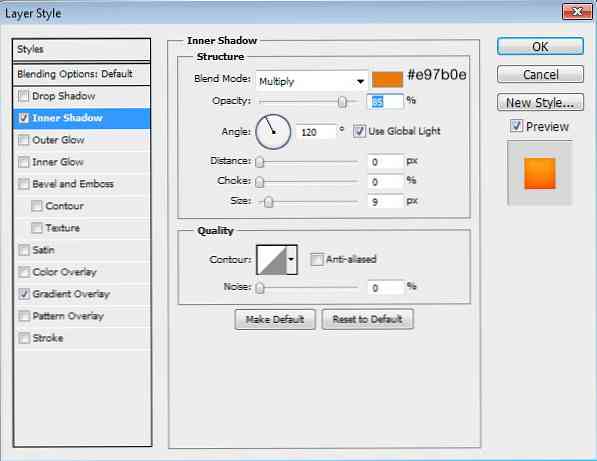
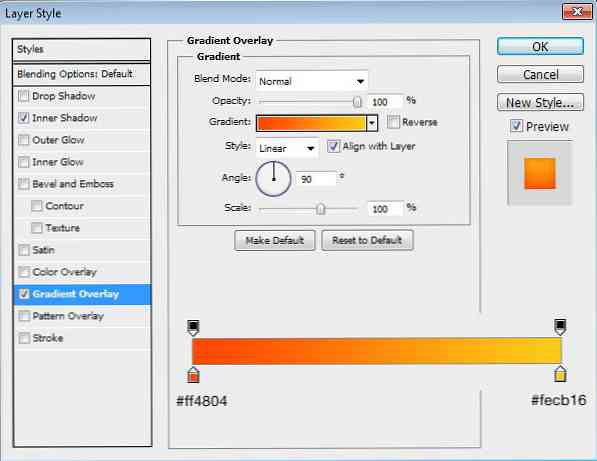
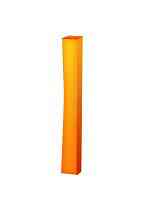
우리는 지금 감자 튀김 한 개를 가지고있다..
4 단계
모든 레이어를 그룹으로 묶습니다. 이 과정을 반복하여 감자를 더 가져옵니다..
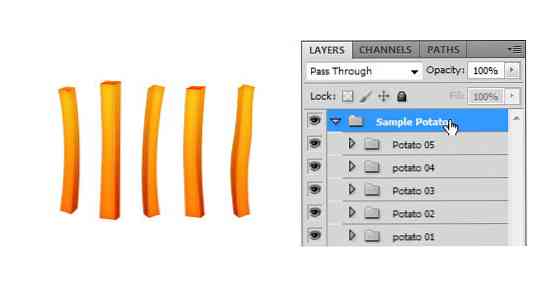
5 단계 : 양동이
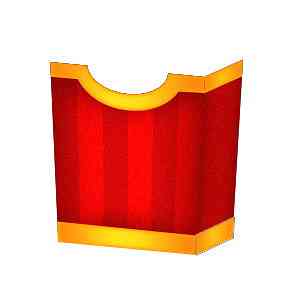
빨간색 다각형 모양을 그립니다. 그 위에 타원형 패스를 추가하고 모드를 빼기로 설정합니다..
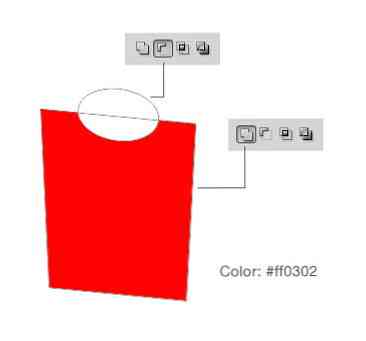
6 단계
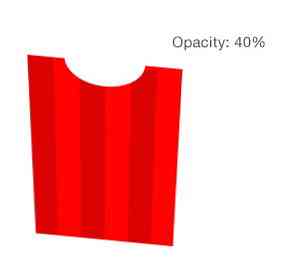
색상 # a60101 및 # ff0302로 줄무늬를 그립니다..
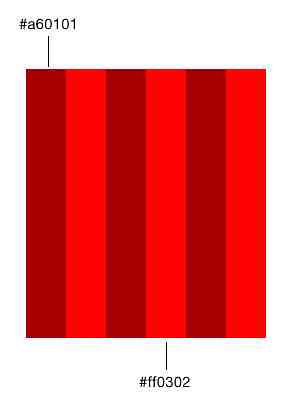
7 단계
양동이 위에 줄무늬를 놓습니다. Ctrl + Alt + G를 눌러 클리핑 마스크로 변환하십시오. 스트리퍼가 버킷의 투시도와 일치 할 때까지 변형 (Ctrl + T)을 누른 다음 Ctrl 키를 누른 채로 드래그하십시오..
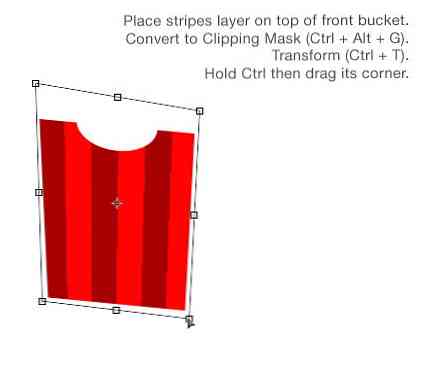
불투명도를 40 %로 줄입니다..
8 단계
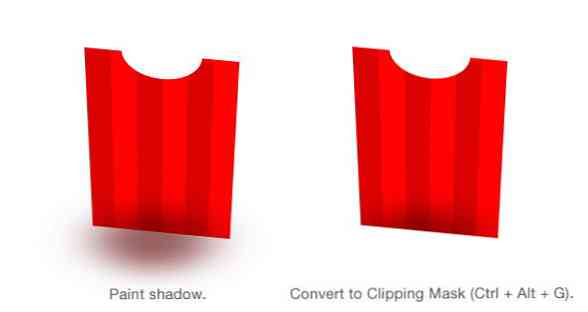
양동이 위에 새 레이어를 만듭니다. 양동이의 아래 부분에 검은 점을 칠하십시오. 레이어를 클리핑 마스크로 변환 (Ctrl + Alt + G).
9 단계
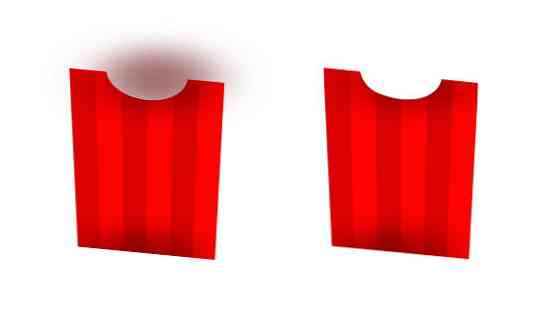
양동이의 위쪽 부분에 이전 과정을 반복합니다..
10 단계
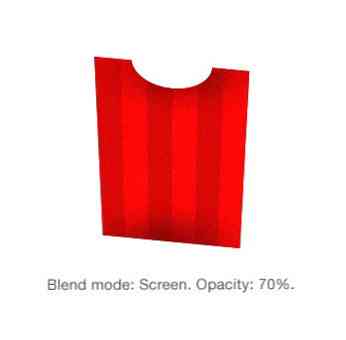
Ctrl 키를 누른 상태에서 프런트 버킷 레이어를 클릭하여 모양을 기반으로 새 선택을합니다. 새 레이어를 만들고 검정으로 채 웁니다. 필터를 사용하여 노이즈 추가, 필터> 노이즈> 노이즈 추가.
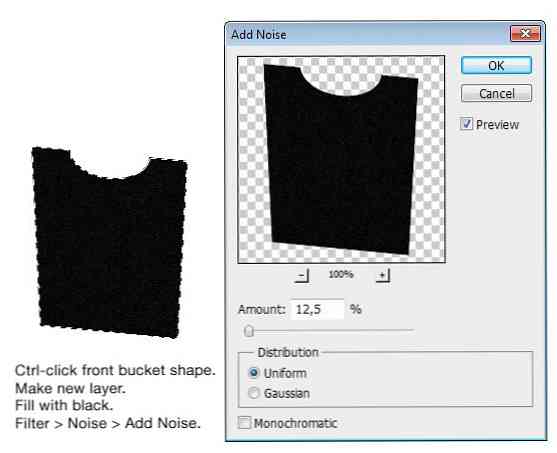
레이어 블렌드 모드를 Screen으로 변경하고 불투명도를 70 %로 줄입니다..
11 단계
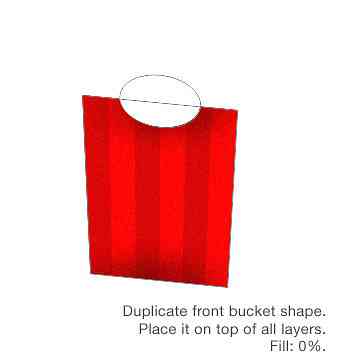
전면 버킷의 레이어 모양을 복제하여 모든 레이어 위에 배치합니다. 채우기를 0 %로 줄입니다..
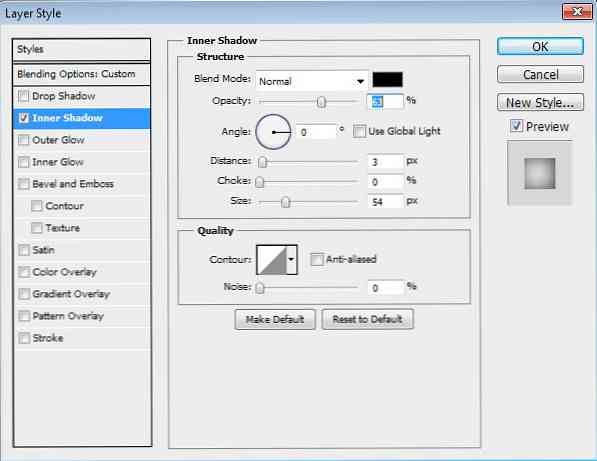
이 설정으로 내부 그림자 추가.
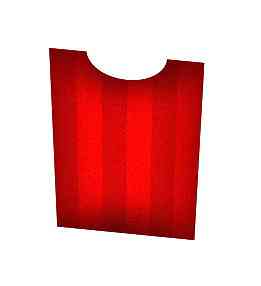
결과는 다음과 같습니다..
12 단계
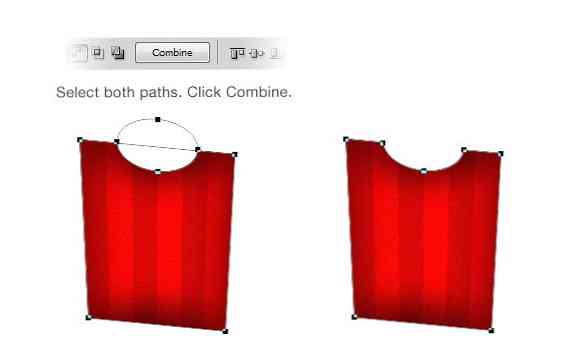
버킷에 수평 줄무늬를 그려 봅시다. 전면 버킷의 레이어 모양이 중복 된 경로입니다. 두 경로를 모두 선택하고 결합을 클릭하십시오. 두 경로가 단일 경로로 병합됩니다..
13 단계
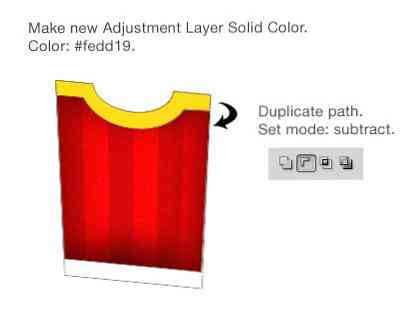
Add Adjustment Layer 아이콘을 클릭하고 Solid Color를 선택하여 경로를 레이어 모양으로 변환합니다. 해당 색상으로 # fedd19를 선택하십시오. 중복 된 경로를 몇 픽셀 아래로 이동합니다. 모드를 빼기로 설정하십시오. 이제 양동이에 노란색 가로 줄무늬가 있어야합니다..
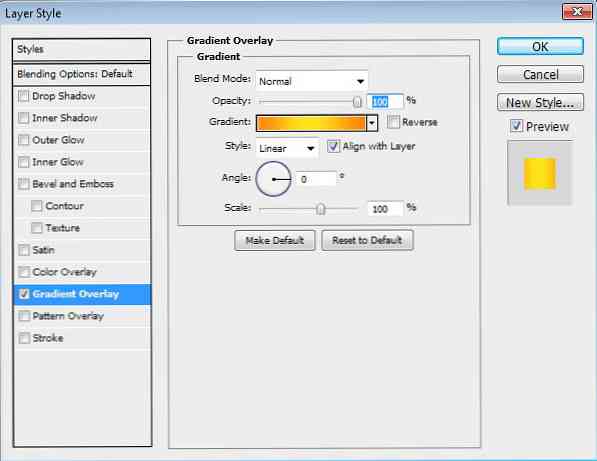
그라데이션 오버레이 및 내부 광선 추가.
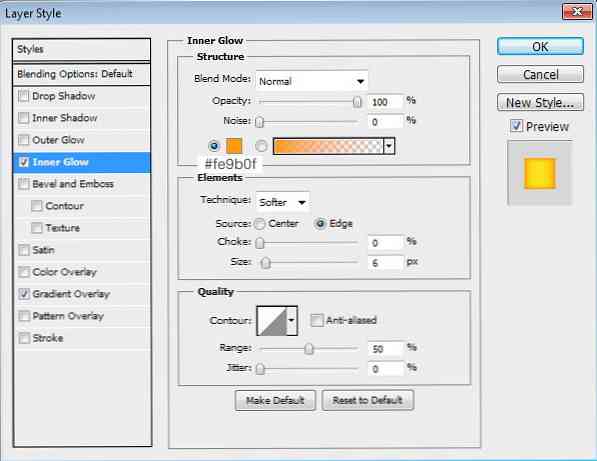
결과는 다음과 같습니다..
14 단계
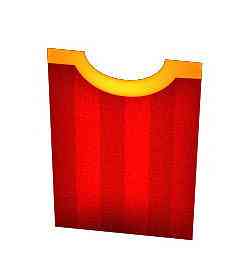
양동이의 왼쪽면에 빨간색 다각형을 그립니다..

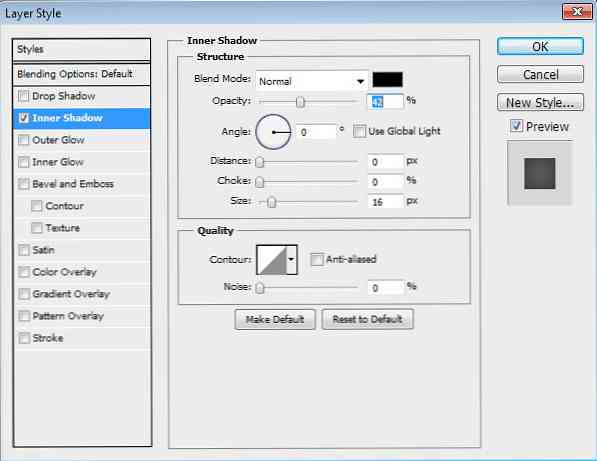
레이어를 두 번 클릭하고 내부 그림자 추가.
15 단계
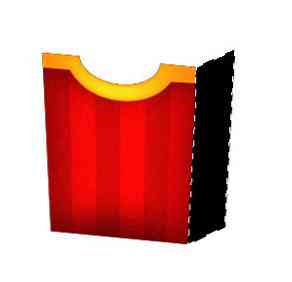
버킷 측면의 모양을 Ctrl- 클릭합니다. 새 레이어 만들기 및 검정색으로 채우기.
16 단계
필터> 노이즈> 노이즈 추가를 클릭하십시오..
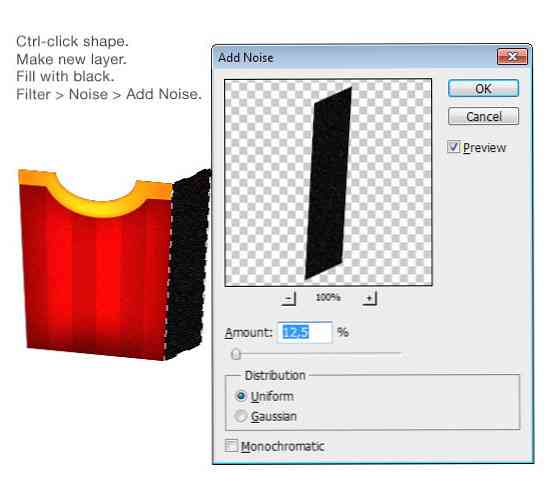
혼합 모드를 Screen으로 설정하고 Opacity를 60 %로 줄입니다..
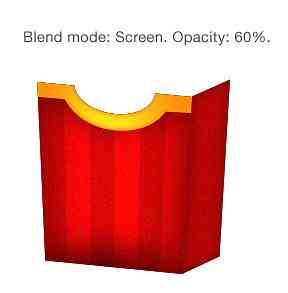
17 단계
양동이 측면에 노란색 가로 줄무늬를 그립니다..
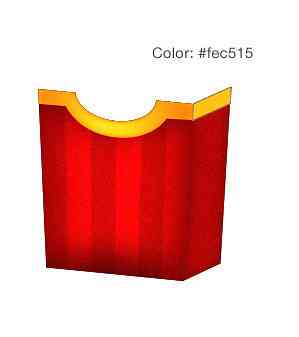
그라데이션 오버레이 및 내부 광선 추가. 여기에서 사용 된 설정은 버킷의 전면에있는 수평 스트라이프와 같습니다 (13 단계).
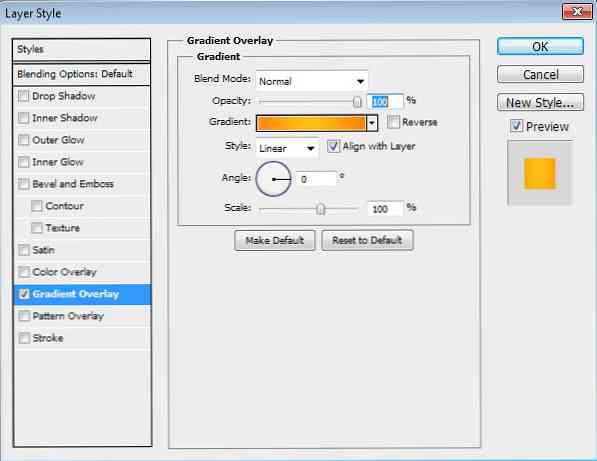
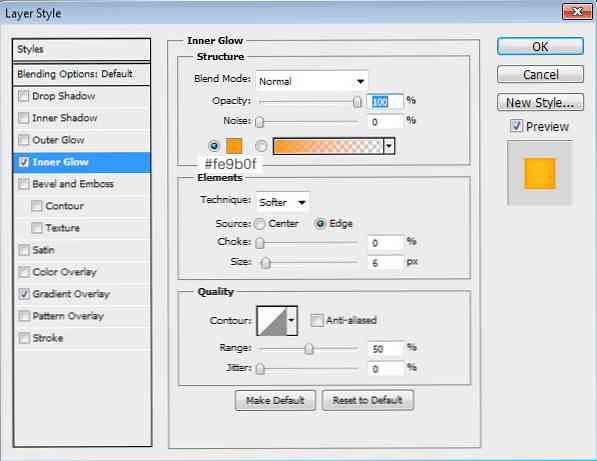
결과는 다음과 같습니다..

18 단계
동일한 기술을 사용하여 양동이의 아래 부분에 더 많은 줄무늬를 그립니다..
19 단계
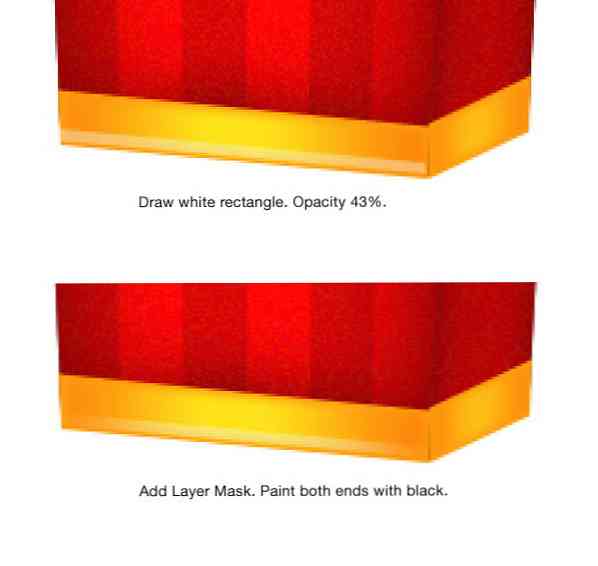
버킷에 강조 표시를 그려 봅시다. 양동이의 아래 부분에 흰색 직사각형을 그리고 불투명도를 43 %로 줄입니다. 레이어 패널에서 레이어 마스크 추가 아이콘을 클릭하고 검정으로 양쪽 끝을 페인팅합니다..
20 단계
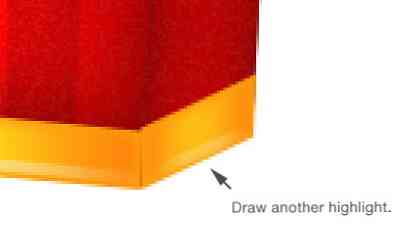
단계를 반복하여 다른 강조 표시 그리기.
21 단계
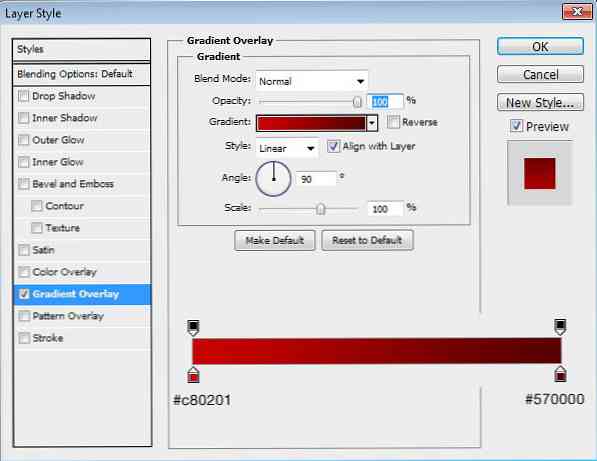
양동이의 두께를 그립니다. 색상을 빨강으로 지정하십시오..
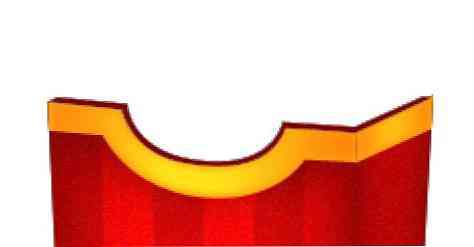
그라디언트 오버레이 추가.
22 단계
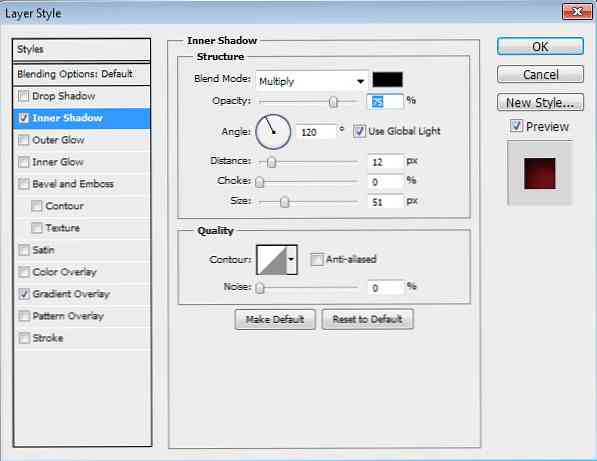
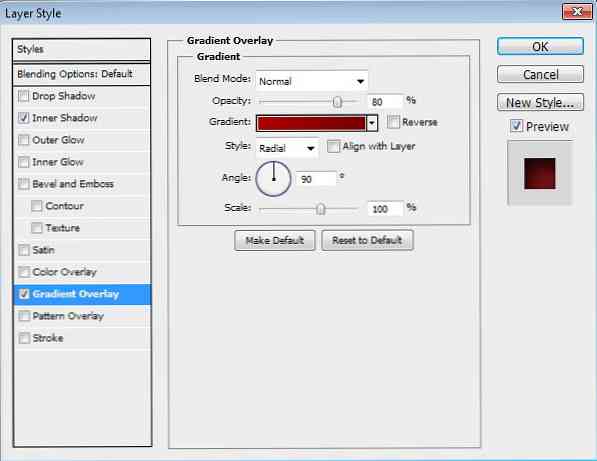
다음으로 양동이의 뒤쪽을 그립니다. 버킷의 전면을 복제하여 모든 레이어 아래로 옮길 수 있습니다. 이번에는 경로 모드를 둘 다 셰이프에 추가로 설정하십시오..
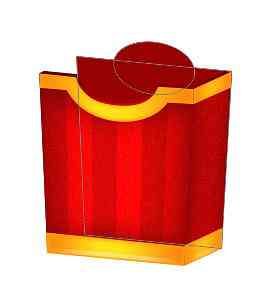
다음 레이어 스타일 추가.
이것이 결과이다..

23 단계
양동이의 다른면을 그립니다..
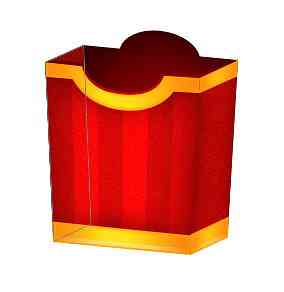
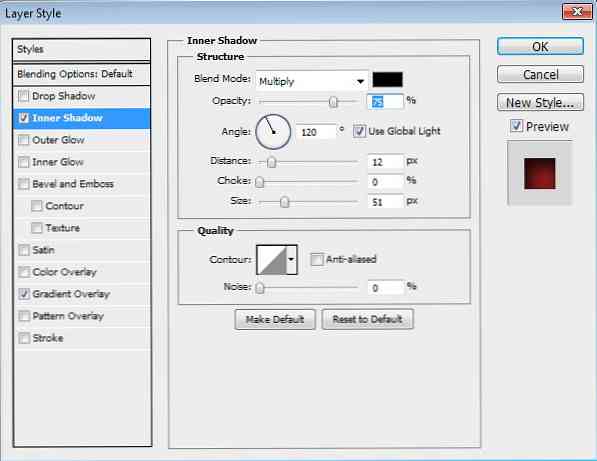
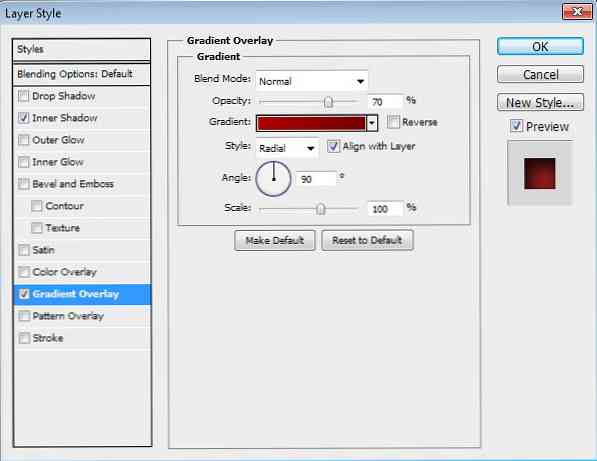
다음 레이어 스타일 추가.
24 단계 : 감자 추가
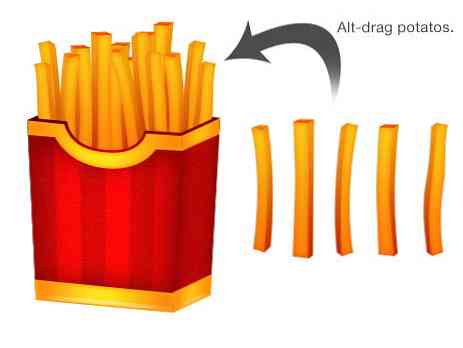
Alt 키를 누른 상태에서 이전에 만든 샘플 감자를 드래그합니다. 양동이 안에 넣으십시오. 자연스러운 위치에 배치하십시오..
25 단계
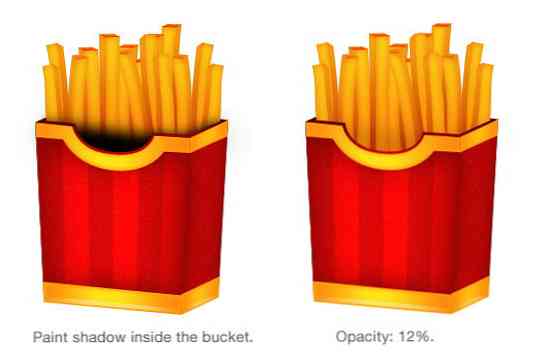
감자와 양동이 사이에 검은 그림자를 만듭니다. 감자 위에 양동이의 그림자를 추가하려면 검정색을 그립니다. 불투명도를 12 %로 줄입니다..
26 단계
새로운 레이어를 만들고 각 감자에 그림자를 그립니다. 이 미묘한 그림자는 감자의 위치에 깊이를 더할 것입니다..
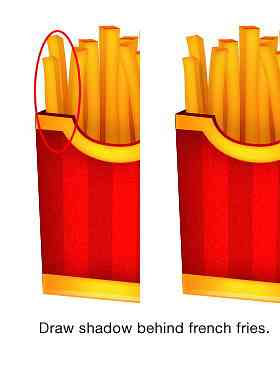
아래에서 각 감자에 미묘한 그림자를 추가하기 전과 후에 GIF 애니메이션을 볼 수 있습니다..

27 단계 : 버킷에 하이라이트 추가
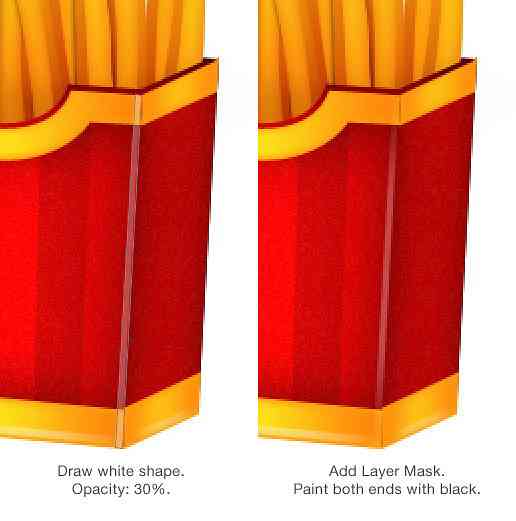
버킷에 몇 가지 하이라이트를 추가해 보겠습니다. 표지 앞면에 흰색 직사각형을 그리고 불투명도를 30 %로 줄입니다. 레이어 마스크 추가 아이콘을 클릭하고 양쪽 가장자리를 검정색으로 페인트합니다..
28 단계
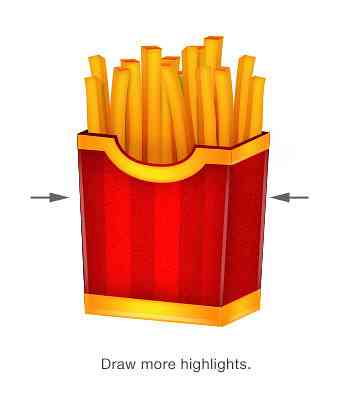
다른면에 더 많은 강조 표시.
29 단계 : 로고
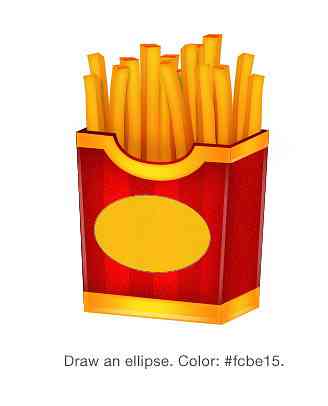
버킷 앞면의 타원을 색으로 그립니다. # fcbe15.
레이어를 두 번 클릭하고 그림자 효과 추가.
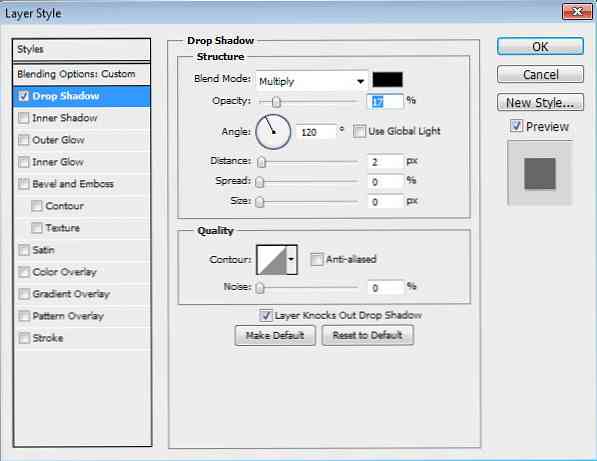
아래는 타원에 미묘한 그림자 드롭의 결과입니다.

30 단계
텍스트 추가 "홍콩의" 글꼴, Ballpark Weiner를 사용하여 타원 위에. Ctrl + T를 눌러 변환을 수행하십시오. Ctrl 키를 누른 채로 드래그하여 텍스트를 기울입니다..
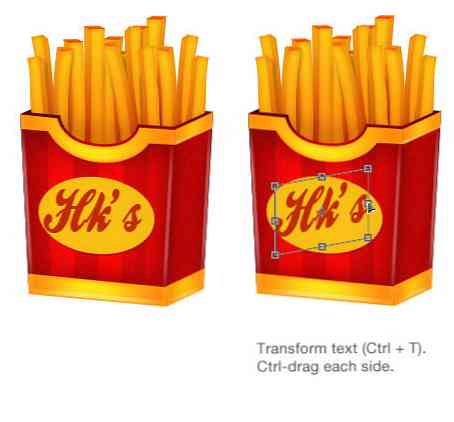
31 단계
텍스트 로고에 다음 레이어 스타일 추가.
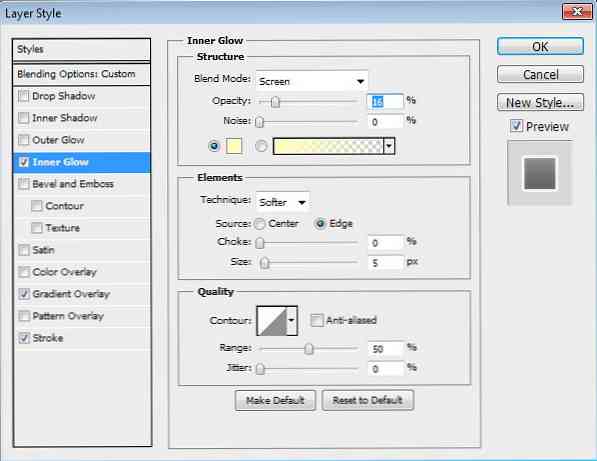
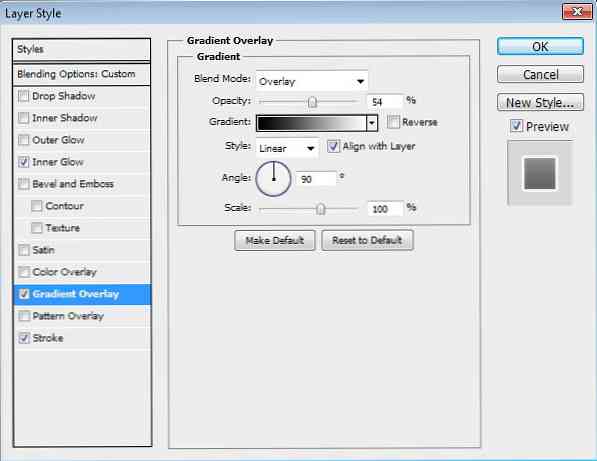
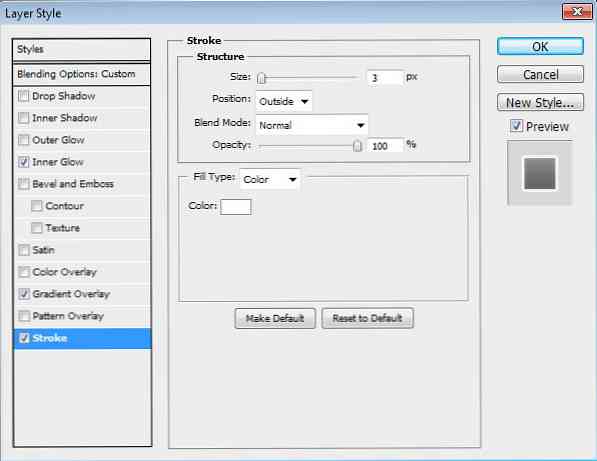
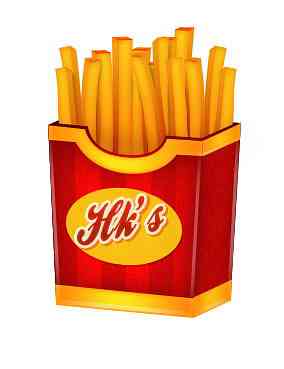
아래는 결과입니다..
32 단계
양동이에 물건을 더 넣을 수 있습니다. 또한 무료 글꼴의 문자를 사용하여 휴지통 아이콘을 추가 할 수 있습니다..

33 단계 : 배경
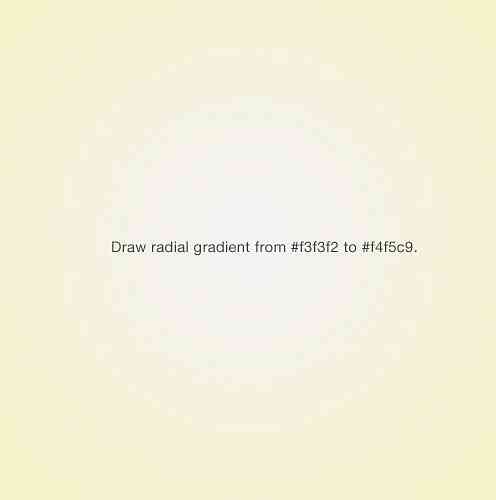
그래디언트 도구를 활성화하십시오. # f3f3f2에서 # f4f5c9까지 방사형 그래디언트를 그립니다..
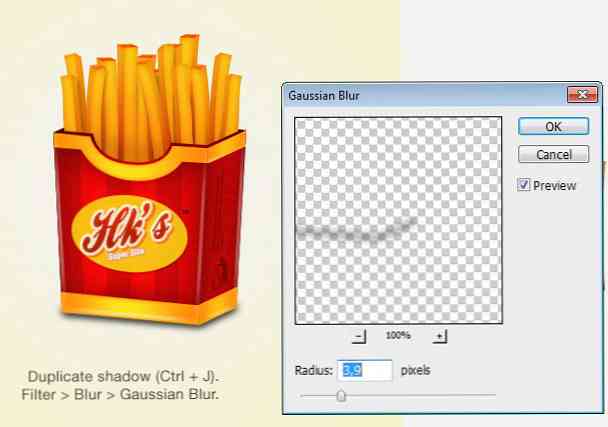
34 단계 : 그림자
버킷 아래에 그림자를 그리려면 부드럽고 작은 브러시를 사용하십시오..

35 단계
Ctrl + J.를 눌러 그림자 레이어를 복제하십시오. 필터> 흐리게> 가우시안 흐리게를 클릭하여 부드럽게하십시오. 그림자가 너무 어두워지면 불투명도를 줄이거 나 할 수 있습니다..
최종 결과 + 다운로드
마지막으로, 이것은 우리의 감자 튀김 아이콘입니다. 이 튜토리얼을 즐기시기 바랍니다. 그리고 너무 많은 감자 튀김을 먹지 말라는 것을 기억하십시오, 그것은 단지 건강하지 않습니다! :)
최종 PSD를 다운로드하려면 여기를 클릭하십시오..

(이 튜토리얼은 Syarip Yunus와 공동으로 진행되었습니다.)


